i will start by saying that regardless of how simple or complicated your project might be...if you are making multiples of something, the key is assembly line production. you will see that common thread in my heart day tutorials.
for spencer's "valentines", i opted to keep it simple and skip the candy (total confession: i just didn't buy any candy...therefore it wasn't an option). i had picked up some valentine's day pencils at party city the previous week, so that was my starting point. in planning coleman's birthday party, i have fallen in love with my 1.5" circle punch. you will see that common theme throughout my heart day projects, too.
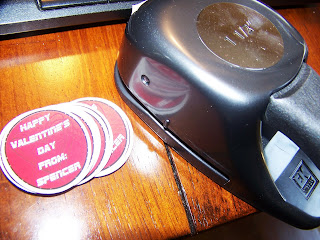
i began by using PSE7 to design 1.5" circles. I kept in simple, for time's sake, and made sure they were NOT girly. I chose a darker shade of red, and added a black outline. I did add a heart, but I lowered the transparency so that it was barely noticable behind the text. I chose a font that looks like the ESPN font. I printed all 24 on one sheet and used my magic punch!
here you can see a good illustration of my assembly line process. the circles are punched and stacked. the pencils are ready. tools are handy. i went ahead and cut all of the ribbon pieces at once.
next, i tied a piece of ribbon to each pencil.
i added some dry scrapbooking adhesive to the back of each circle.
and then attached the circle over the ribbon on the pencil.
and there they are...finished products. like i said, SUPER SIMPLE.


No comments:
Post a Comment